Using Ollama and Continue as a GitHub Copilot Alternative
Unless you've just awoken from a coma, you've likely tried using a Large Language Model (LLM) in your IDE.
Some hate it, while others love it.
You probably use GitHub Copilot for your coding needs, and perhaps even Code Whisperer if you're an AWS user. But what if you can't afford it, or your company doesn't permit the use of these services? To be clear, using these services involves sending a copy of your text and code to them for processing, and they use your data to train their models.
Anyway, back on topic...
Due to such limitations at work, I've been using Ollama and Continue as alternatives to Copilot, and it has been working quite well so far!
Ollama - Run a Local LLM
If you haven't heard of it, Ollama is an open-source alternative to GPT models like ChatGPT, focusing on privacy and control. It's designed to run locally (or privately) without sending your data to third parties. Woot!
After installing Ollama, you can run a local instance of an LLM and interact with it through your terminal or IDE plugins.
For this guide, let's install one model for prompting and another for autocompletion.
Pull the Models
First, keep in mind that models are constantly changing, so you need to ensure your models are up-to-date. Also, consider the amount of GPU and memory available on your machine.
As of writing this guide, llama3.1 has just been released and is great. However, check the following resources for the latest recommended models:
ollama pull llama3.1:8bFor autocompletion, deepseek-coder-v2 is an excellent model, but check https://docs.continue.dev/setup/select-model#autocomplete to see if there are any updates or newer models available.
ollama pull deepseek-coder-v2:16b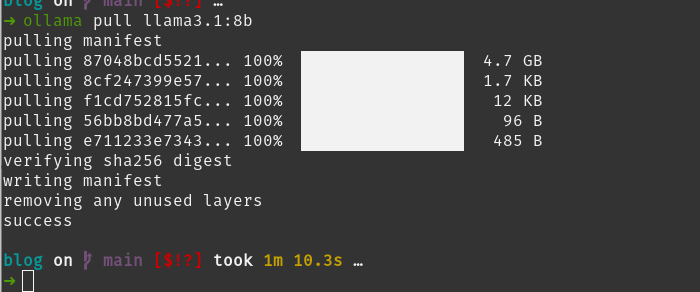
Once the models are downloaded, you can run them locally:
ollama run llama3.1:8bNext, we'll configure VS Code with the Continue extension to use these models for autocompletion and prompting.
Continue - LLM Extension for VS Code
Install the Continue Extension from the VS Code Marketplace.
https://marketplace.visualstudio.com/items?itemName=Continue.continue
Once installed, we'll modify its configuration to use the models we just downloaded. Open the configuration file:
# On Linux/macOS
code ~/.continue/config.json

# On Windows (using Command Prompt)
# code %USERPROFILE%\.continue\config.json
# or (using PowerShell)
# code $env:USERPROFILE\.continue\config.json
Add the following two entries into your ~/.continue/config.json file:
{
  "models": [
    // ... other models if any ...
    {
      "title": "Llama 3.1 8B (Ollama)", // Descriptive title
      "provider": "ollama",
      "model": "llama3.1:8b"
    }
    // ...
  ],
  "tabAutocompleteModel": {
    "title": "Deepseek Coder V2 16B (Ollama)", // Descriptive title
    "provider": "ollama",
    "model": "deepseek-coder-v2:16b"
  }
  // ... rest of config ...
}
Note: The config file does not support comments. Ensure you maintain the correct JSON format. Remove the example comments (
// ...) before saving.
Now, restart VS Code and try out the new configuration!
Try It Out
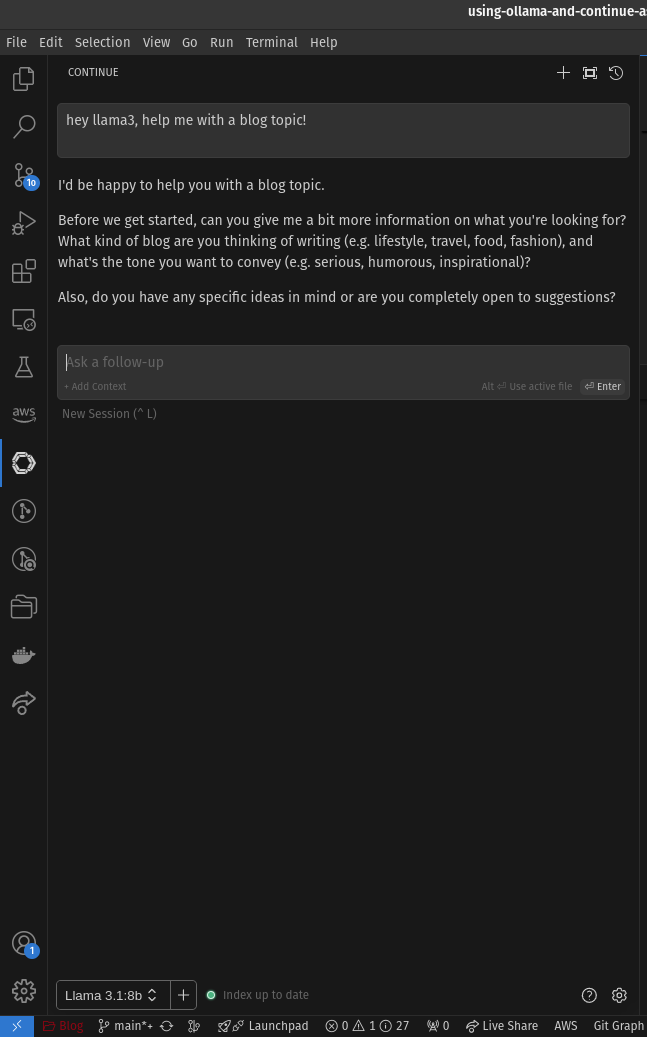
On the activity bar, click the Continue icon. At the bottom of the prompt input area, select the Llama 3.1 8B (Ollama) model (or the title you chose) from the dropdown menu. Then, try typing a prompt and see if you get helpful suggestions!
Now, edit any code file and start typing to see if the autocompletion works with your Deepseek Coder V2 16B (Ollama) model!
Conclusion
Congratulations! You've successfully integrated custom LLMs into VS Code using the Continue Extension. This setup runs the LLMs locally on your machine, offering a free and private alternative to cloud-based AI assistants.